_BestEstimatedROI_Roi.png)
_BestSupport_QualityOfSupport.png)


NexHealth Support

Add or edit a provider's NPI and Tax ID
NexHealth Verification relies on your Providers' NPI (National Provider Identifier) to seamlessly verify your patients' insurance.
NexHealth uses the provider assigned to a patient, or to the patient's appointment to verify the patient's insurance. If the patient does not have a provider assigned, we will look for another active provider with an NPI. If the incorrect provider is being used for verification, it may be because the desired provider has an invalid NPI in your health record system.
There are several options for dealing with Provider NPIs and NexHealth Verification:
- Create a fallback NPI for NexHealth to use if one is not present for a specific patient.
- Create a global NPI for NexHealth to use for ALL verifications.
- Update providers' NPIs in the practice management system (Dentrix, OpenDental, and Eaglesoft)
To use NPIs from your health record system and create a fall back NPI in NexHealth:
1. Navigate to the gear icon and select Settings.
2. Choose NPI and Tax ID configuration from the left side menu.
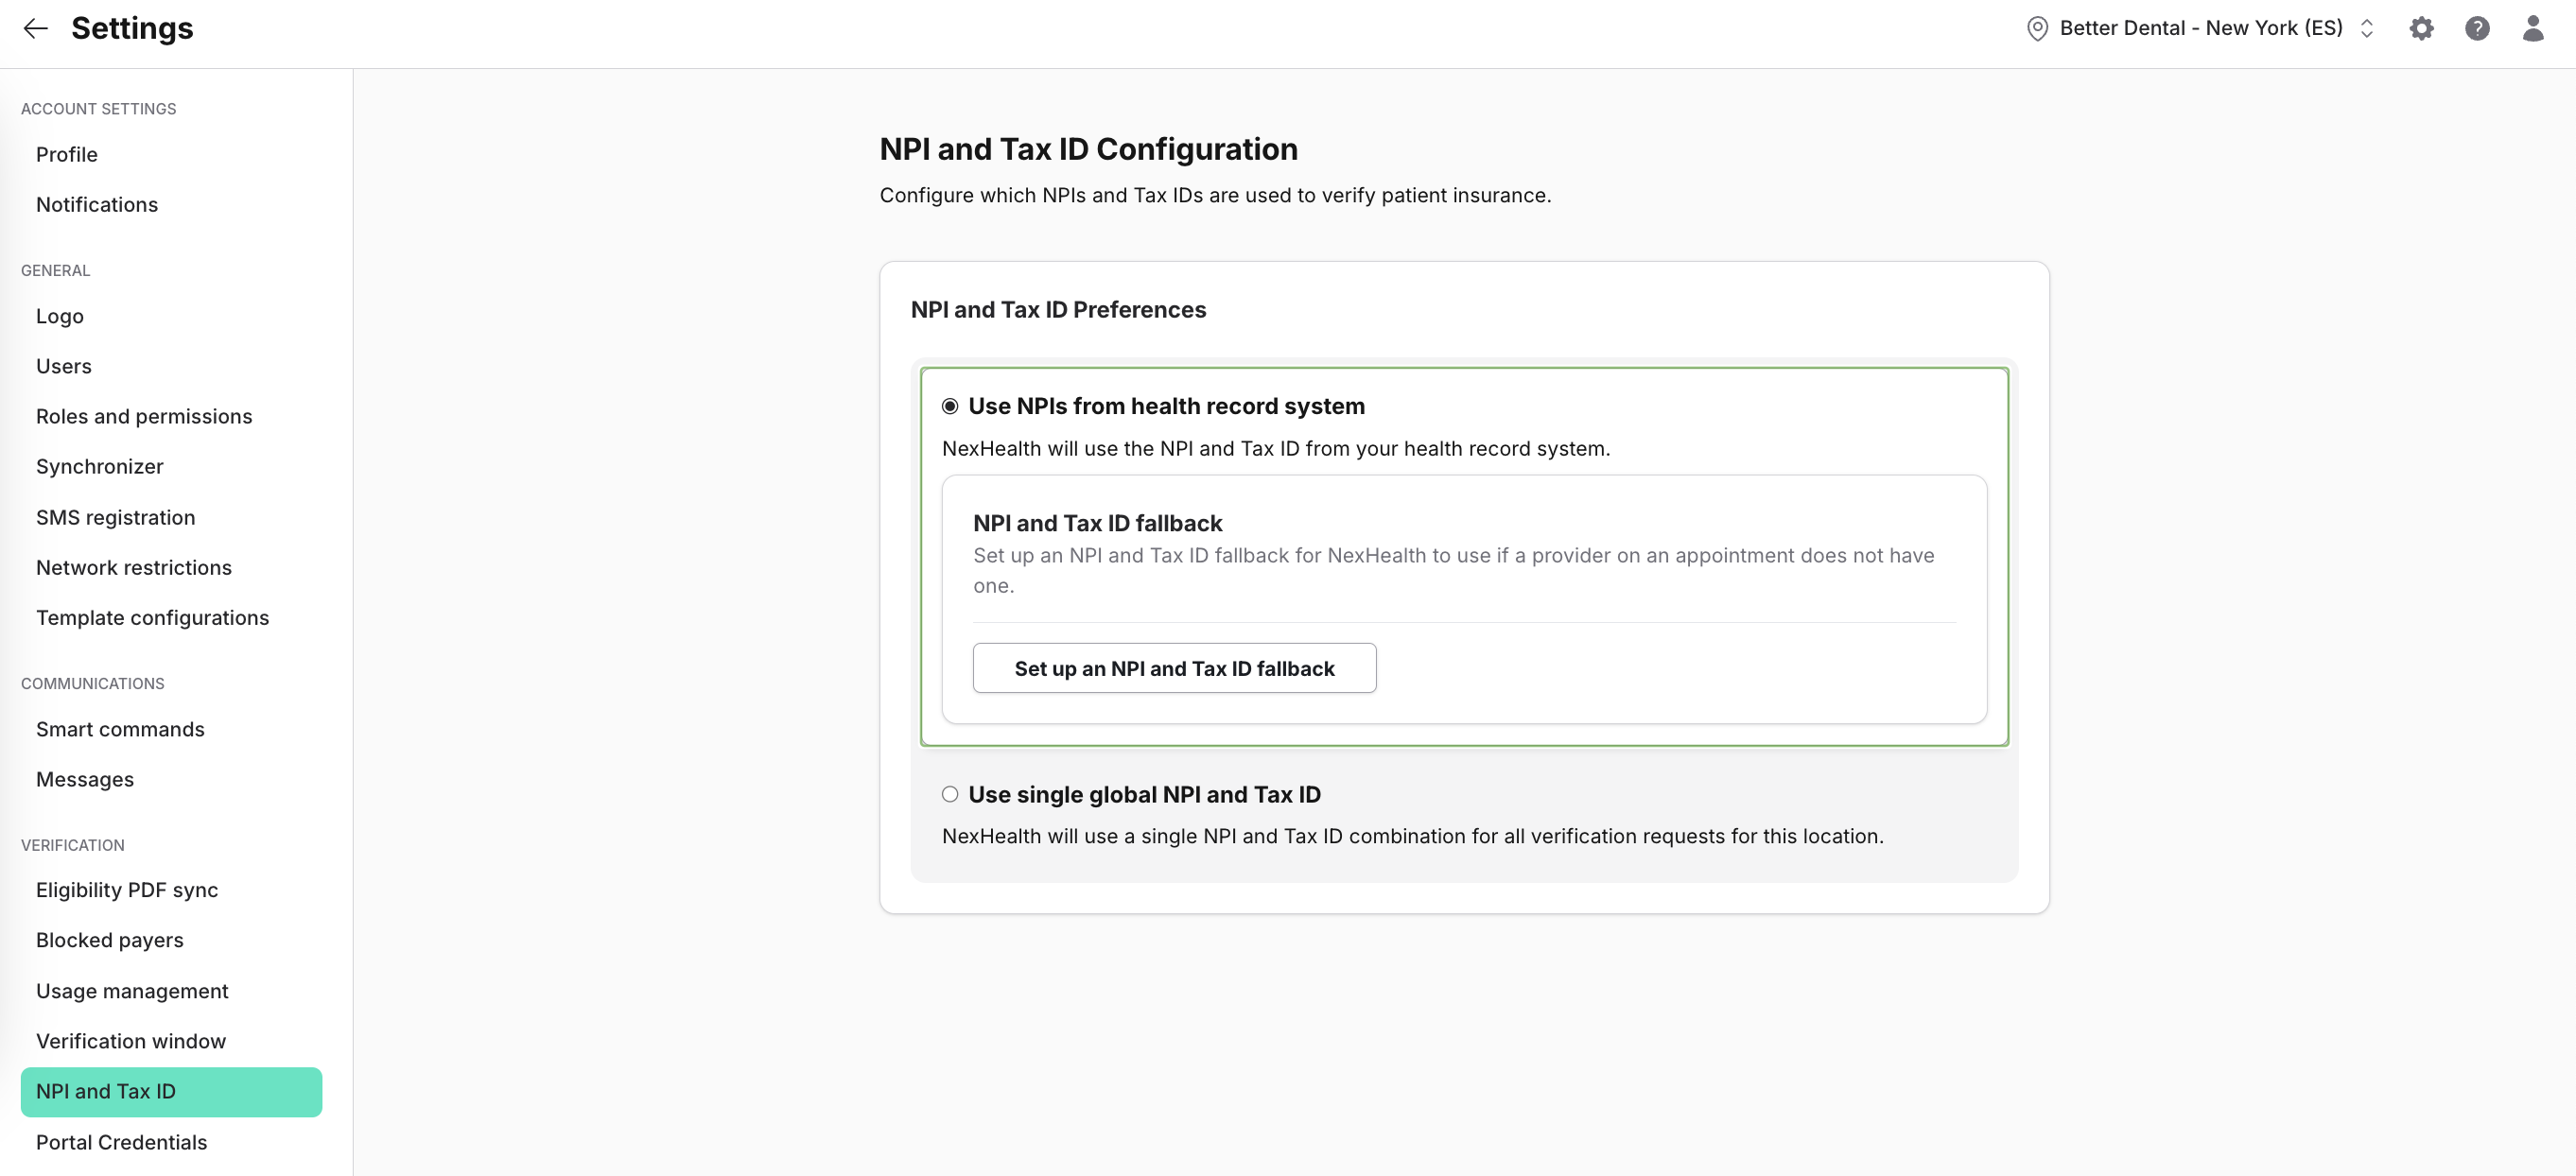
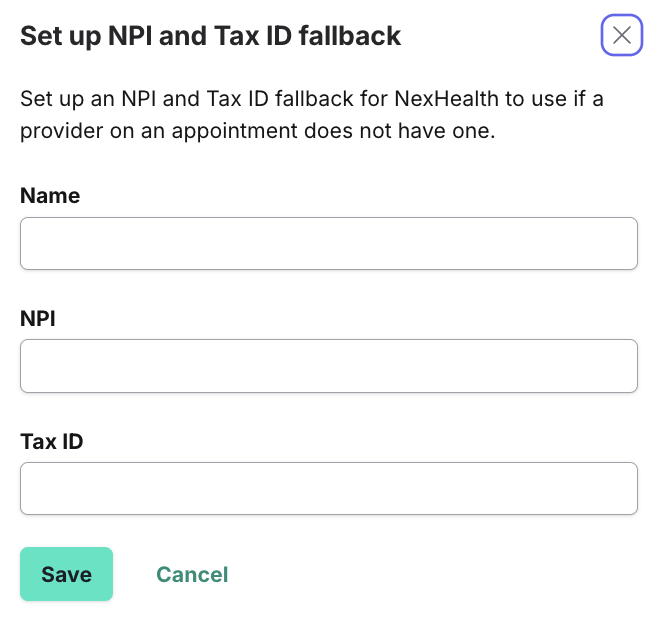
3. To set up a fallback ID, click on Set up an NPI and Tax ID fallback.
4 Enter the provider's Name, NPI, and Tax ID and click Save. NexHealth will use this NPI/Tax ID combination any time we attempt to verify insurance for a patient without one.
To set up a Global NPI and Tax ID to use for ALL verifications:
1. Select Use single global NPI and Tax ID.
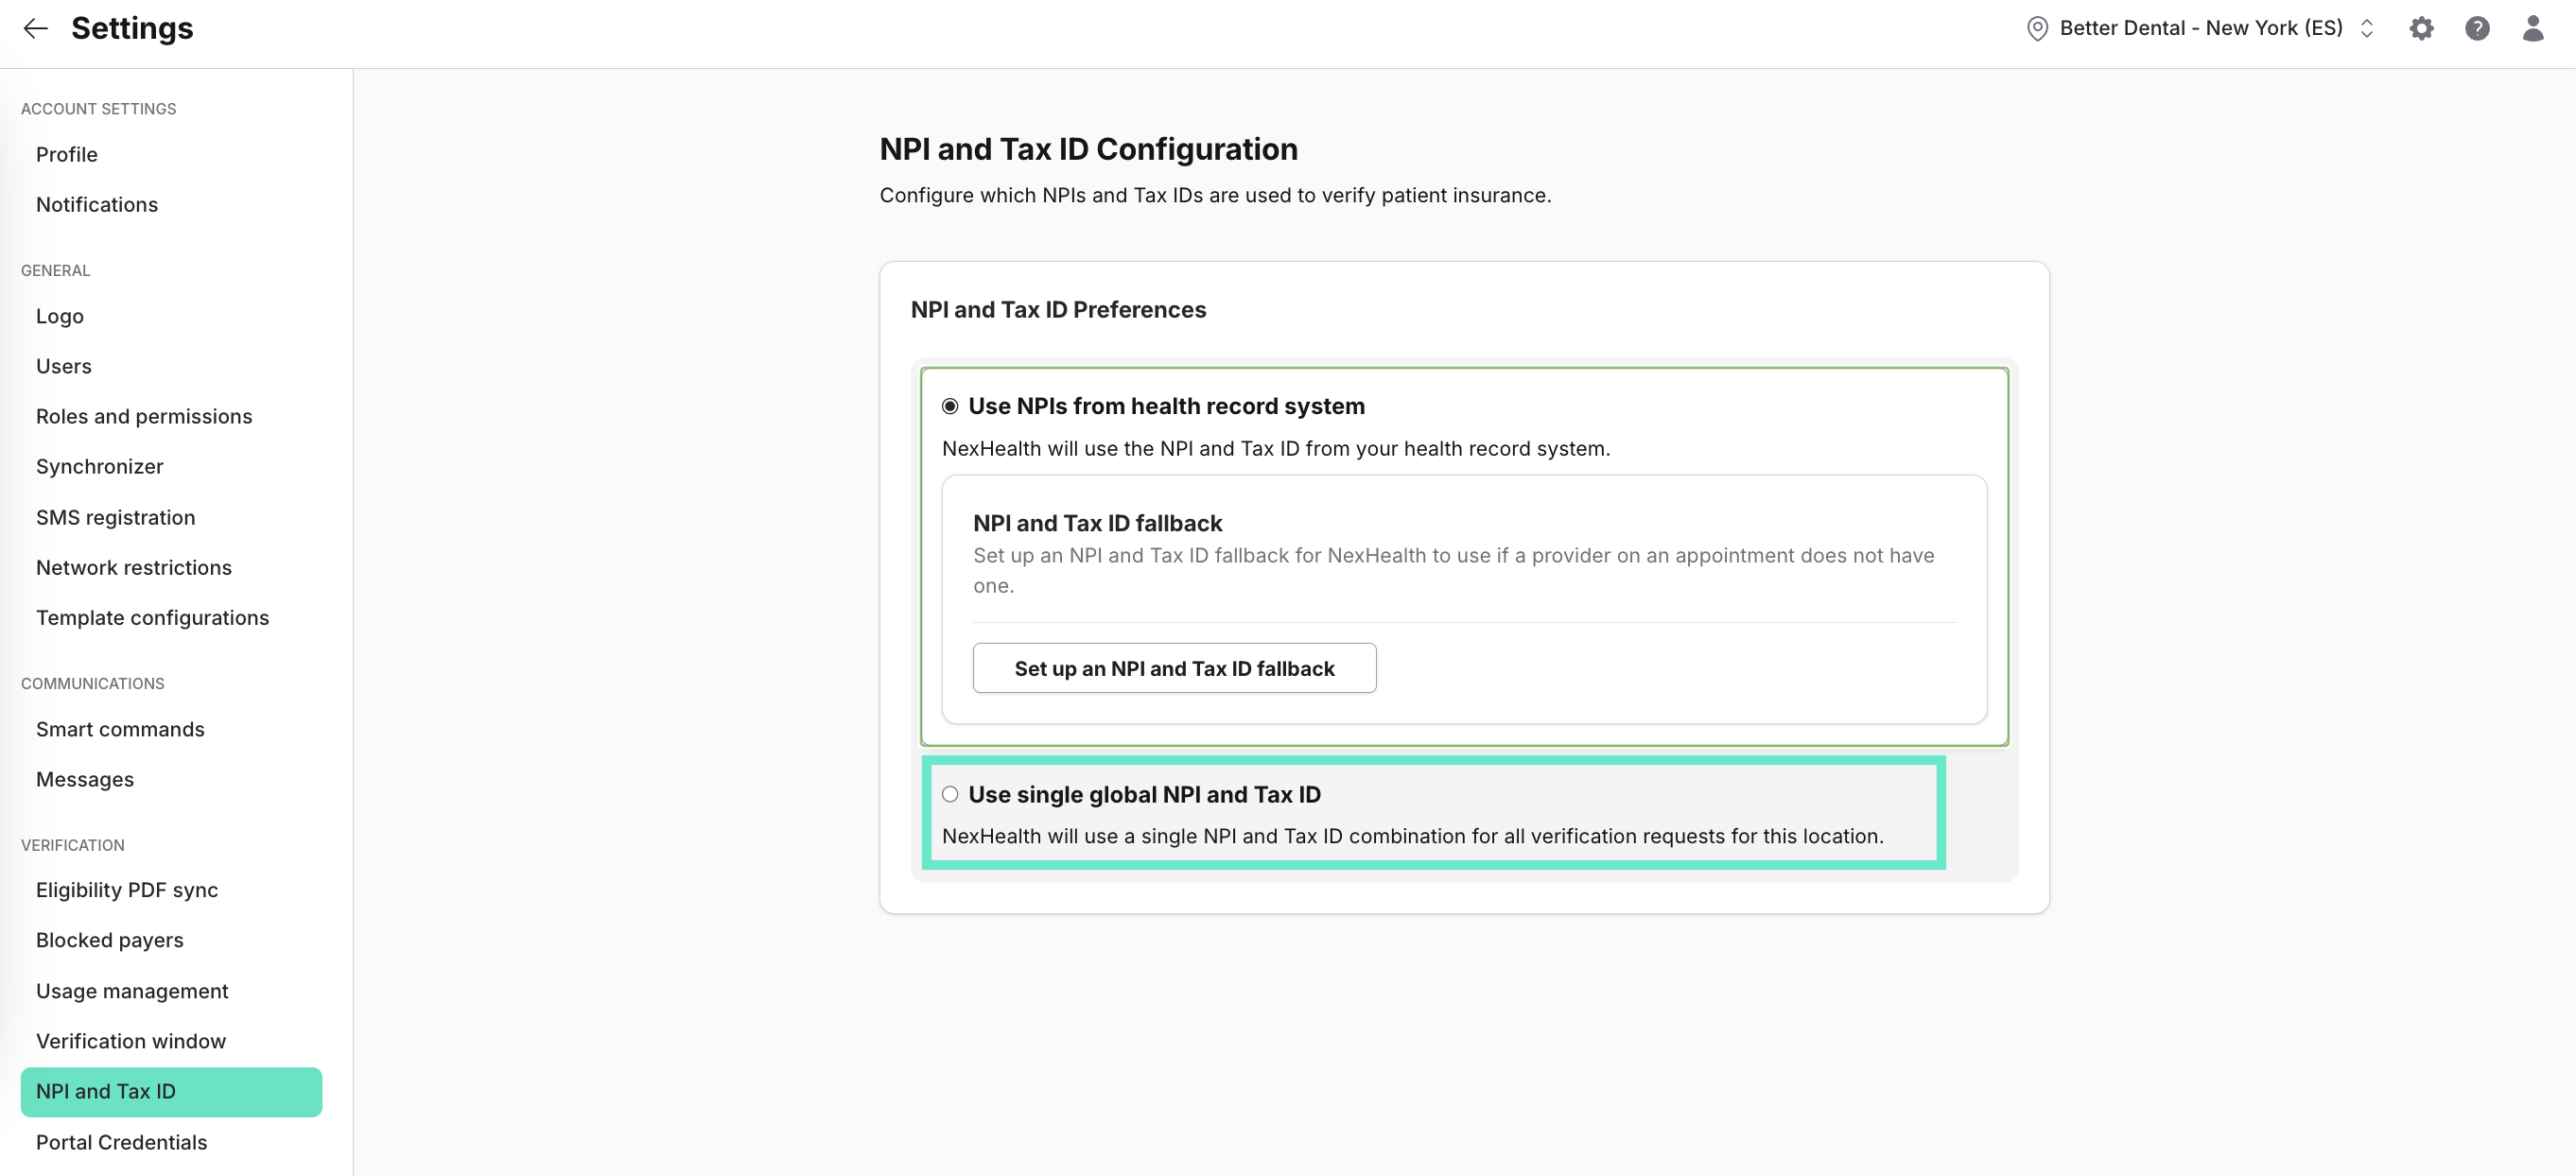
2 Enter the Provider Name, NPI, and Tax ID and click Save. NexHealth will use this provider NPI and Tax ID for ALL verifications.
To add or edit provider NPIs in Dentrix, OpenDental, and Eaglesoft:
Once added or edited, NexHealth will read the new NPI on the next overnight verification cycle. Going forward, verifications will use the updated NPI. NPIs can be entered manually for on-demand verifications.
How to add or edit a Provider's NPI in Dentrix:
1. From the Appointment book click on the Office Manager icon

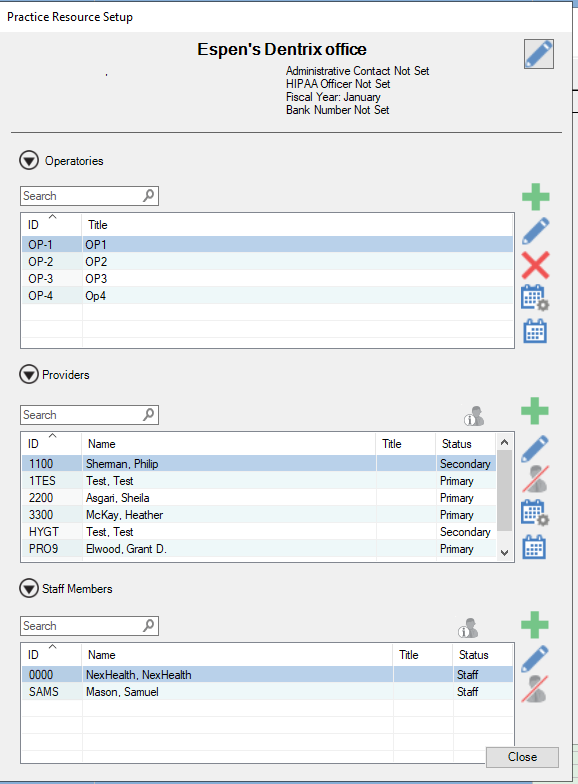
2. Click on Maintenance --> Practice Setup --> Practice Resource Setup
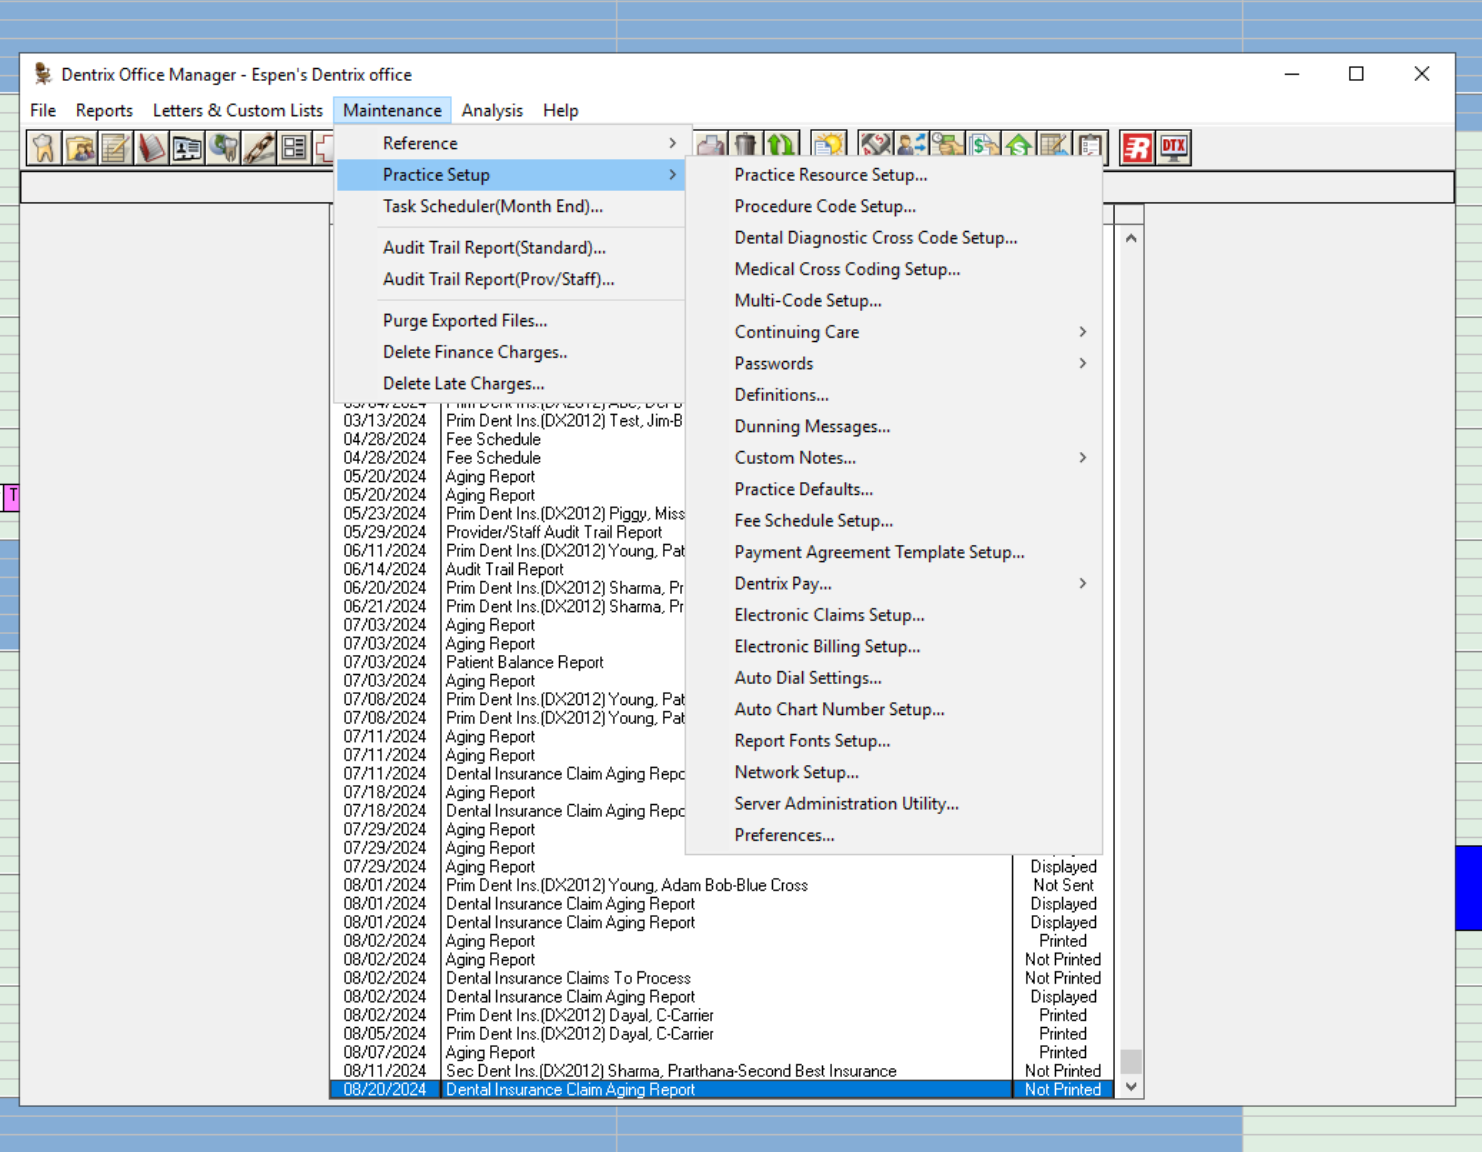
3. Locate the Provider and click on the Edit (pencil) icon.
4. Enter the 10-digit NPI number in the NPI field.
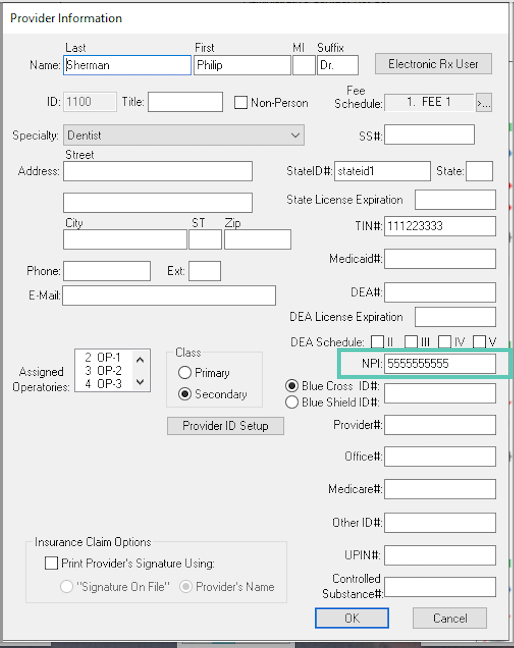
- Click OK to save.
How to add or edit a Provider's NPI in Open Dental:
- From the Schedule, click on Lists.
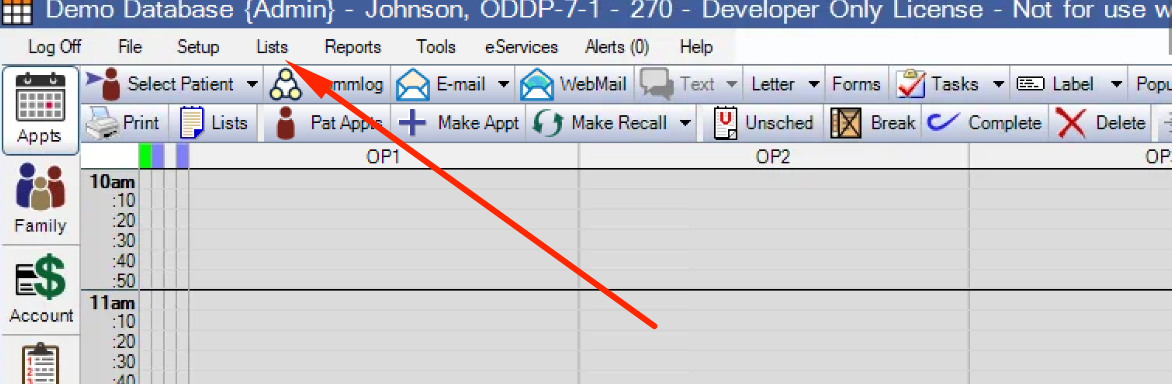
- Select Providers.
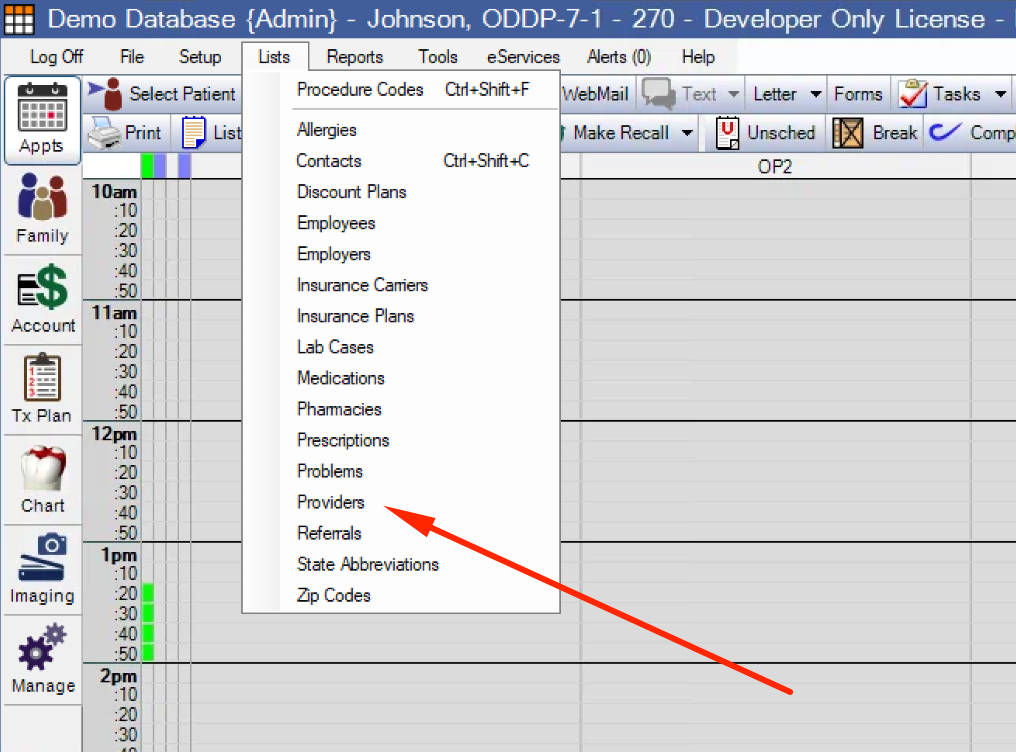
- Double-click on the Provider to update.
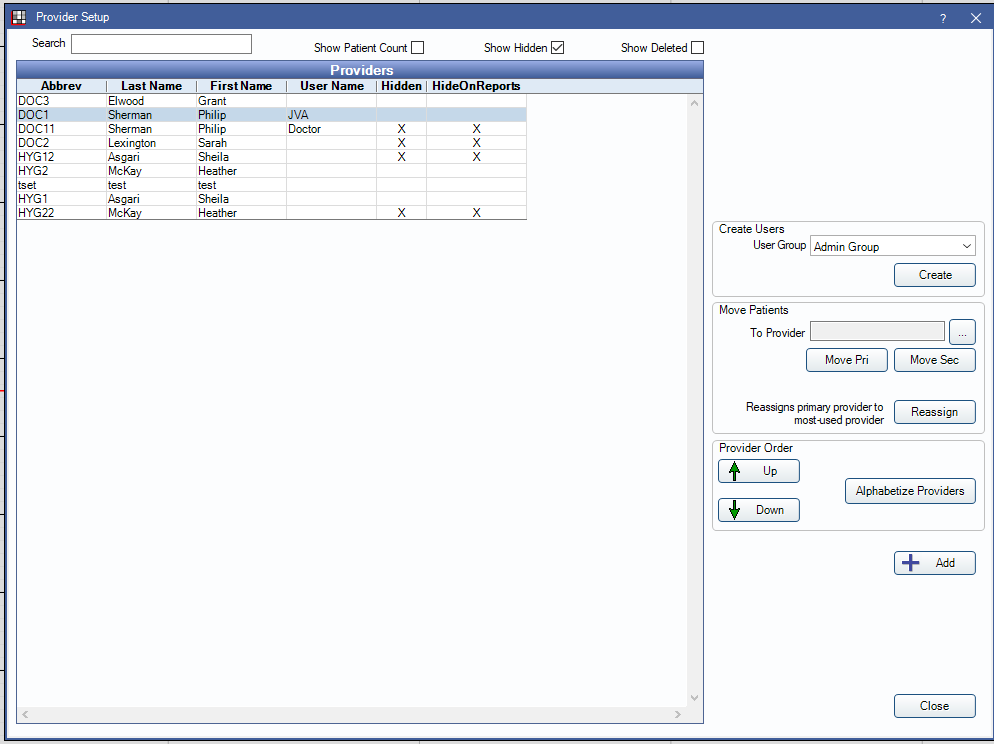
- Enter the 10-digit NPI in the National Provider ID field.
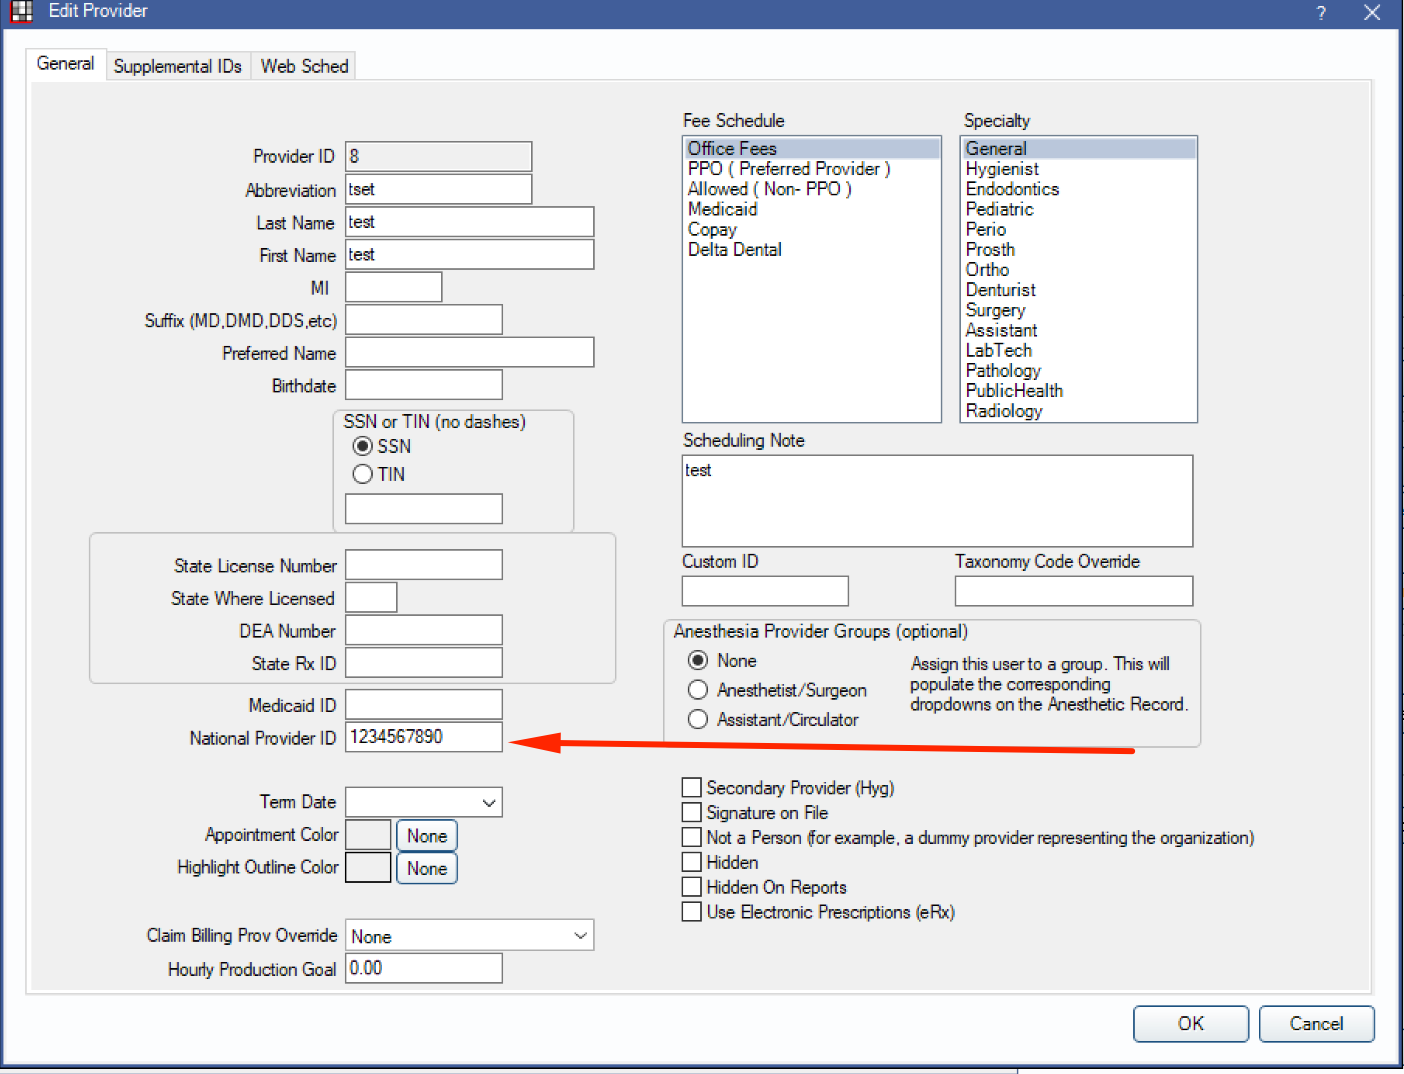
5. Click OK to save.
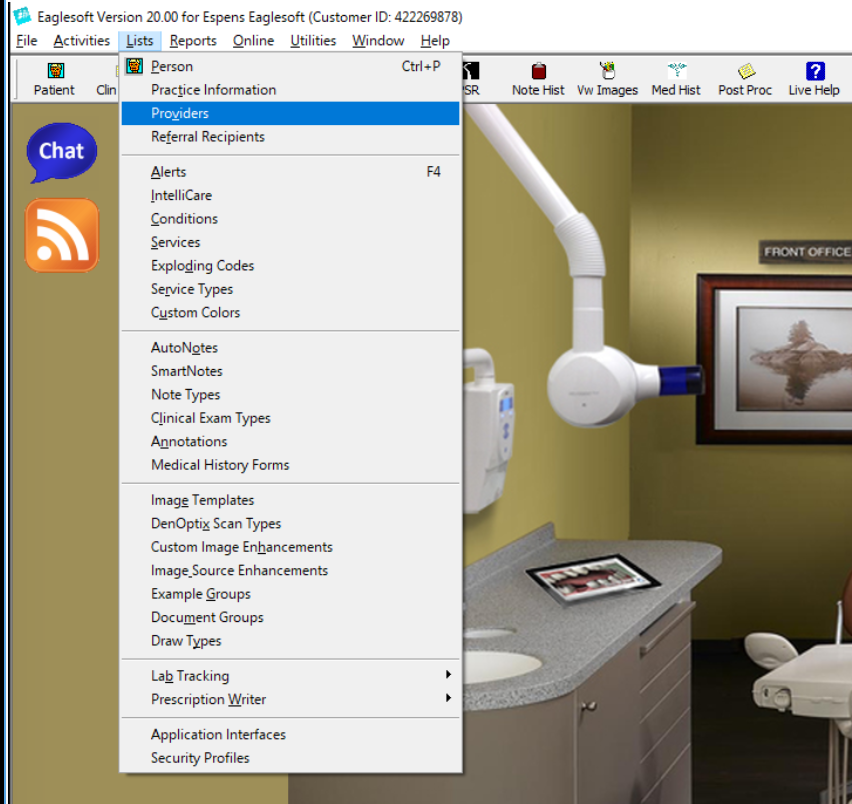
How do add or edit a Provider's NPI in Eaglesoft:
- From the Office Management screen, select Lists --> Providers.
- Select the Provider and click Edit.
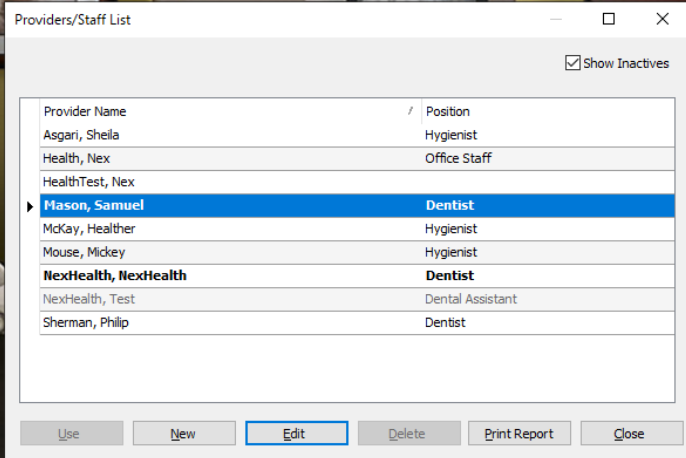
- Click on Identification.
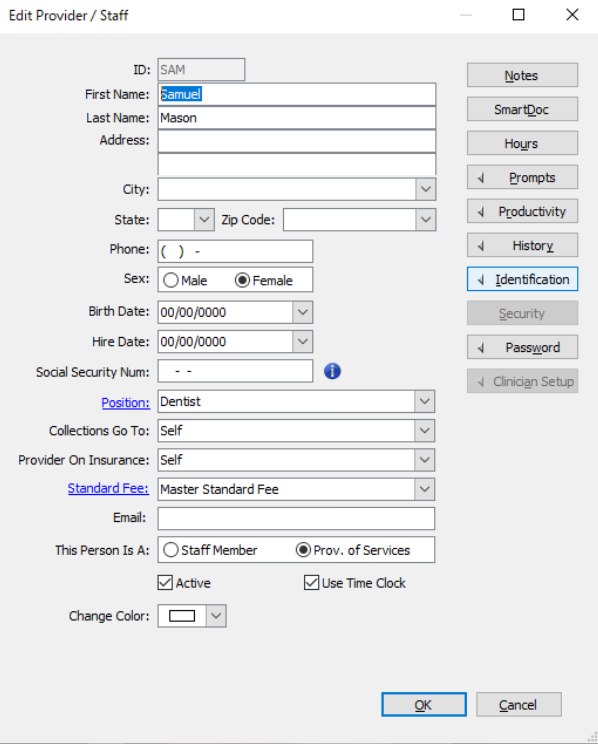
- Enter the 10-digit NPI in the National Provider ID field.
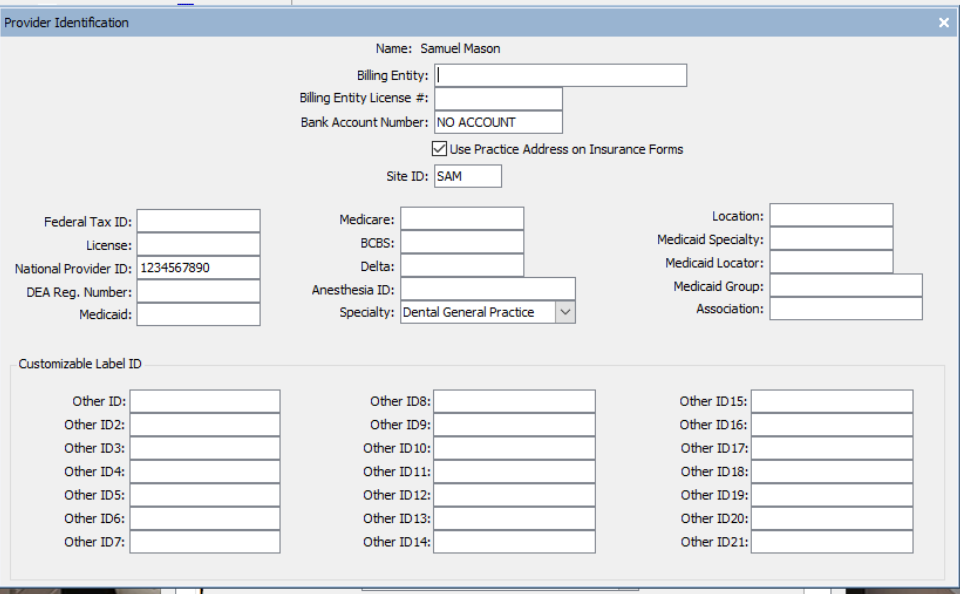
- Click on the X to close the Identification window, then click OK, then click Close to save.
And I've used at least 6 others." - Shaye, Falmouth Dentistry